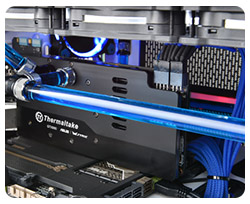
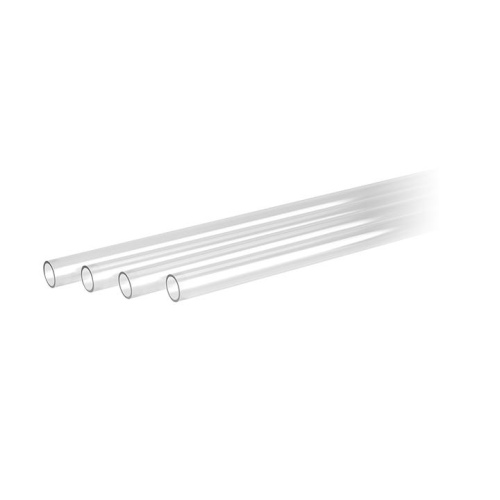
Thermaltake V-Tubler PETG Tube 12mm OD 10mm ID 500mm 4 Pack
Thermaltake introduces the V-Tubler PETG solid tubing for custom PC water cooling
configurations. Manufactured from premium PETG, the V-Tubler rigid tubing allows users to
route the tubes runs exactly to their heart’s content. Designed with 12mm OD PETG tube
adapter fittings, it gives users better mounting, easier fitting, and ideal flow to make
your system a showcase for all to see.

Tt LCS Certified
Tt LCS Certified is a Thermaltake exclusive certification
applied only to products that pass the design and hardcore enthusiasts standards that a true
LCS chassis should hold to. The Tt LCS certification was created so that we at Thermaltake
can indicate to all power users which chassis have been tested to be best compatible with
extreme liquid cooling configurations, ensuring you get the best performance from the best
features and fitment.

100% PETG Material
Made in Taiwan, the V-Tubler PETG Tube is constructed from
superior PETG material which is reliable, non-toxic, and substance free. Thicker walls
ensure safe operation, enabling the users to make the straightest run as well as tightest
bends without the need of excessive compression fittings and 90 degree angle rotaries.
Working temperature ranges from -4℉ (-20℃) to 143.6℉ (62℃).
- Outer Diameter: 12 mm
- Inner Diameter: 10 mm
- Length: 500mm*4

Remarkable Expansion
Designed for use with 12mm OD PETG tube adapter fittings,
V-Tubler PETG Tube is pre cut into retail coils of four 500mm lengths, allowing enthusiasts
to build up aesthetically-superior water cooling systems by allocating the radiators to each
particular component and incorporating externally-modular upgrades for their chassis.

*Coolant operating temperature exceeds 50℃/122°F may potentially affect the PETG tube.
*Thermaltake V-Tubler PETG Tube Series is recommended for use with the Pacific Temperature
Sensor.

Cautions
Thermaltake recommends the following steps to be taken
after completing your water loop setup
- It is strongly recommended to use market proven pre-mix coolant, such as Thermaltake Coolant 1000. It offers great performance while preventing the entire cooling system – copper, brass, nickel, aluminum, and steel – from corrosion.
- Fill the reservoir with coolant and cycle the power on and off several times while the pump pushing the coolant into the loop.
- DO NOT let the pump run dry, when there is no liquid entering the pump turn off your power immediately
- Fill the reservoir to the top as it will prevent air from going into the pump
- If necessary tilt the system slightly from side to side to bleed the air out of the loop.
- Place some paper towels under fittings and joining points to test for leaks.
- Run the loop with the fill port open for about 24 hours to completely bleed the air out of the loop
- Before starting, flush out your system correctly to prevent any coolant or unwanted particles sticking to your tubes, radiators and other cooling components.
- Coolant might fade over time.
Uwagi
Thermaltake zaleca następujące kroki, które należy podjąć przed użyciem chłodnic i bloków wodnych z serii Pacific:
- Aby zapewnić czystą pętlę, przed użyciem przepłucz chłodnice i bloki wodne wodą destylowaną.
- Nie używaj wody z kranu ani wody destylowanej jako chłodziwa, może to uszkodzić pętlę i zmniejszyć wydajność.
- Zdecydowanie zaleca się stosowanie sprawdzonego na rynku wstępnie zmieszanego płynu chłodzącego, takiego jak Thermaltake Coolant 1000. Zapewnia on doskonałą wydajność, jednocześnie chroniąc cały obieg cieczy przed korozją.
- Przed przechowywaniem elementów do chłodzenia wodą należy je wyczyścić, wypłukać i wysuszyć. Zapewni to dłuższą żywotność komponentów.
Thermaltake zaleca następujące kroki, które należy wykonać po zakończeniu konfiguracji pętli wodnej:
- Zdecydowanie zaleca się stosowanie sprawdzonego na rynku wstępnie zmieszanego płynu chłodzącego, takiego jak Thermaltake Coolant 1000. Zapewnia on doskonałą wydajność, jednocześnie zapobiegając korozji całego układu chłodzenia – miedzi, mosiądzu, niklu, aluminium i stali.
- Napełnij zbiornik płynem chłodzącym i kilkakrotnie włączaj i wyłączaj zasilanie, podczas gdy pompa wpycha płyn chłodzący do pętli.
- NIE pozwól, aby pompa pracowała na sucho; jeśli do pompy nie dostanie się płyn, natychmiast wyłącz zasilanie.
- Napełnij zbiornik do góry, aby zapobiec przedostawaniu się powietrza do pompy.
- W razie potrzeby lekko przechylić system na boki, aby wypuścić powietrze z pętli.
- Umieść kilka ręczników papierowych pod łącznikami i punktami łączenia, aby sprawdzić, czy nie ma wycieków.
- Uruchom pętlę z otwartym portem napełniania na około 24 godziny, aby całkowicie usunąć powietrze z pętli.
- Przed rozpoczęciem należy dokładnie przepłukać system, aby zapobiec przywieraniu chłodziwa lub niepożądanych cząstek do rur, chłodnic i innych elementów chłodzących.
- Płyn chłodzący może z czasem wyblaknąć.


